
Yoast SEO plug-in is one of the best SEO solutions for WordPress websites and will dramatically improve the SEO performance of your Website.
Environment setup:
- We recommend that you use Google Chrome browser to navigate the web,
- Administrator Access to your WordPress Blog.
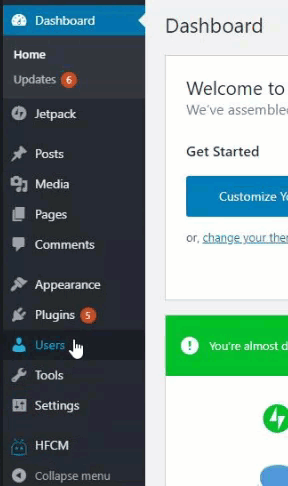
Log In to your WordPress Admin Panel
- First, go to your WordPress Admin panel (yourwebsitedomain/wp-admin).
- If you are not logged in automatically, simply log-in as an Administrator:
Also Read: Install Google Tag Manager to a WordPress Site
Installing the “Yoast” Plugin
- In the menu on the left side, please select “Plugins”.
- Then click on “Add New”.
- In the upper right corner, you should see a search bar. Type “Yoast”.

- In search results, you will find “Yoast SEO” by Team Yoast.
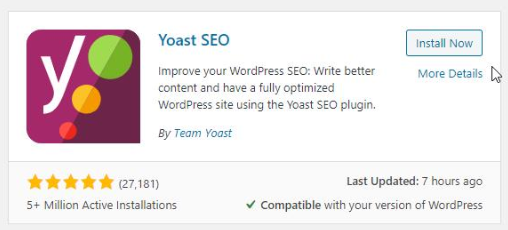
- Click on “Install Now”.
- Wait for the plugin to install.
- After that click on “Activate”.
Also Read: Set Up Google Analytics on your Website using WordPress Plug-In
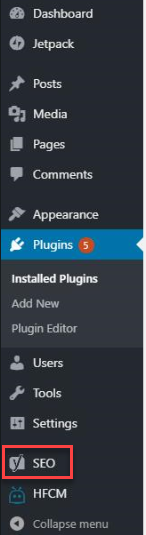
Basic Yoast Configuration
- Now you should see that a new “SEO” category appeared on the left side menu.
- Click on it.
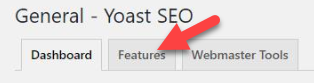
- Now click on the “Features” tab.
- Make sure all positions are turned “On”.
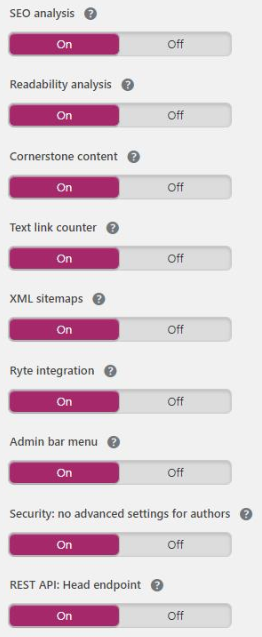
- Then click on “Save changes” at the bottom of the page.
- Now click on “Search Appearance” under the “SEO” category on the left side menu.
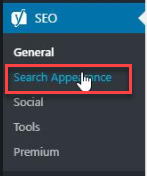
- Choose the “General” tab.

- Enter your organization or brand name.
- We recommend that you also add the “Organization logo”. Just click on “Upload Image”.
- Then click on “Select Files” to select the official logo of your company on your computer.
- After you upload your picture click on “Use Image”.
- And then click on “Save changes”.
- Now click on the “Content Types” tab.

- Press on “Pages” so more settings will appear.

- Now make sure all options here (1,2,3) are set exactly like on the screenshot below.
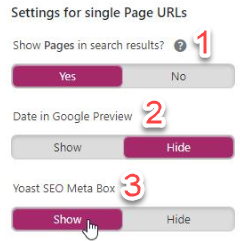
- Then click on “Save changes”.
Also Read: Check & Set Up Google Analytics on your Website using Google Tag Manager
Adding Social Media URL
- Now click on “Social” under the “SEO” category on the left side menu.
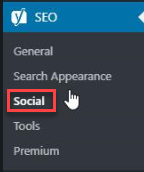
- Here you type the URLs of the official social media profiles account of your organization.
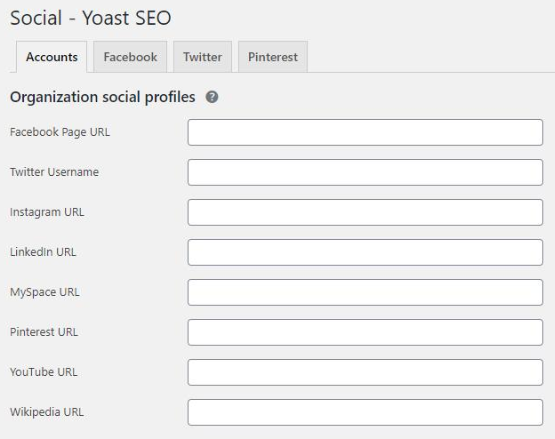
- Click on “Save changes”.
Also Read: Build Up E-A-T
That’s all for now, you just installed one the best SEO Plugin for your WordPress website. Building a strong foundation for the future SEO efforts of your website so you can soon get more organic visitors to your website.